A lot of backyards sat unused for years, not because the owners did not want to be outside, but because nothing was inviting to step out onto.
No defined space, no comfortable surface, just a lawn that turned to mud after rain and grew wild by July. Then someone installed a paver patio, and the backyard became the most-used space in the house. Dinners moved outside. Weekend mornings started there with coffee.
Guests asked about it.
A well-designed paver patio changes how a home feels from the inside out, but only when the design decisions behind it are made carefully and in the right order.
Start by Deciding What the Space Actually Needs to Do
The most common patio design mistake is skipping the conversation about purpose. A patio meant for quiet mornings needs different dimensions and positioning than one built for large gatherings. A cooking and dining setup requires space for a grill, a table, and clearance for people to move between them comfortably.
A lounge-focused patio might prioritize proximity to shade, a garden view, or a water feature. Before any measurements are taken, the intended function should be clearly defined. That definition drives every decision that follows.
Getting the Measurements Right Before Anything Else
Accurate measurement is not optional. Underestimating the space produces a patio that feels cramped, where chairs scrape the edges, and guests have nowhere to stand comfortably. Overestimating wastes material and money. Measurements should account for furniture with people seated and in motion, clearance around any built-in features, and transition zones to surrounding grass, garden beds, or the home itself.
Mark the proposed perimeter with stakes and string before committing to a layout. Walk through it with the stakes in place. Set out furniture to scale. The actual space will feel different from how it looks on paper, and adjustments are effortless at this stage compared to after installation.
Choosing a Paver Material That Delivers What You Need
Concrete pavers are the most commonly used material for good reason. They are durable, widely available in multiple shapes and colors, and relatively easy to replace individually when needed. Brick pavers offer a classic character that suits both formal and casual settings. Natural stone, including bluestone, travertine, and slate, delivers a premium result but carries higher material and installation costs. Porcelain pavers have become increasingly popular because of their stain resistance and low maintenance requirements over time.
The right material reflects the budget, the intended use, and the character of the home and its surroundings. A modern property with clean architectural lines often pairs well with large-format concrete or porcelain. A traditional home with existing brick details tends to benefit from a material that complements rather than competes.
Pattern and Color: The Choices That Define How It Feels
Pattern selection has a dramatic effect on the visual character of a patio. A running bond pattern is clean and directional, creating a sense of movement. Herringbone patterns add visual interest and perform well in high-traffic areas because of how the interlocking angles distribute weight. Basketweave is traditional and symmetrical. Ashlar or random layouts using multiple paver sizes read as more organic and informal, which works well in naturalistic garden settings.
Color should work with the home’s exterior, not fight it. Neutral tones are the safest starting point. An accent border in a contrasting color can define edges and add visual structure without overwhelming the overall result. Texture affects both safety and aesthetics. Smooth finishes look refined but become slippery when wet. Tumbled or textured pavers provide grip and a more casual character.
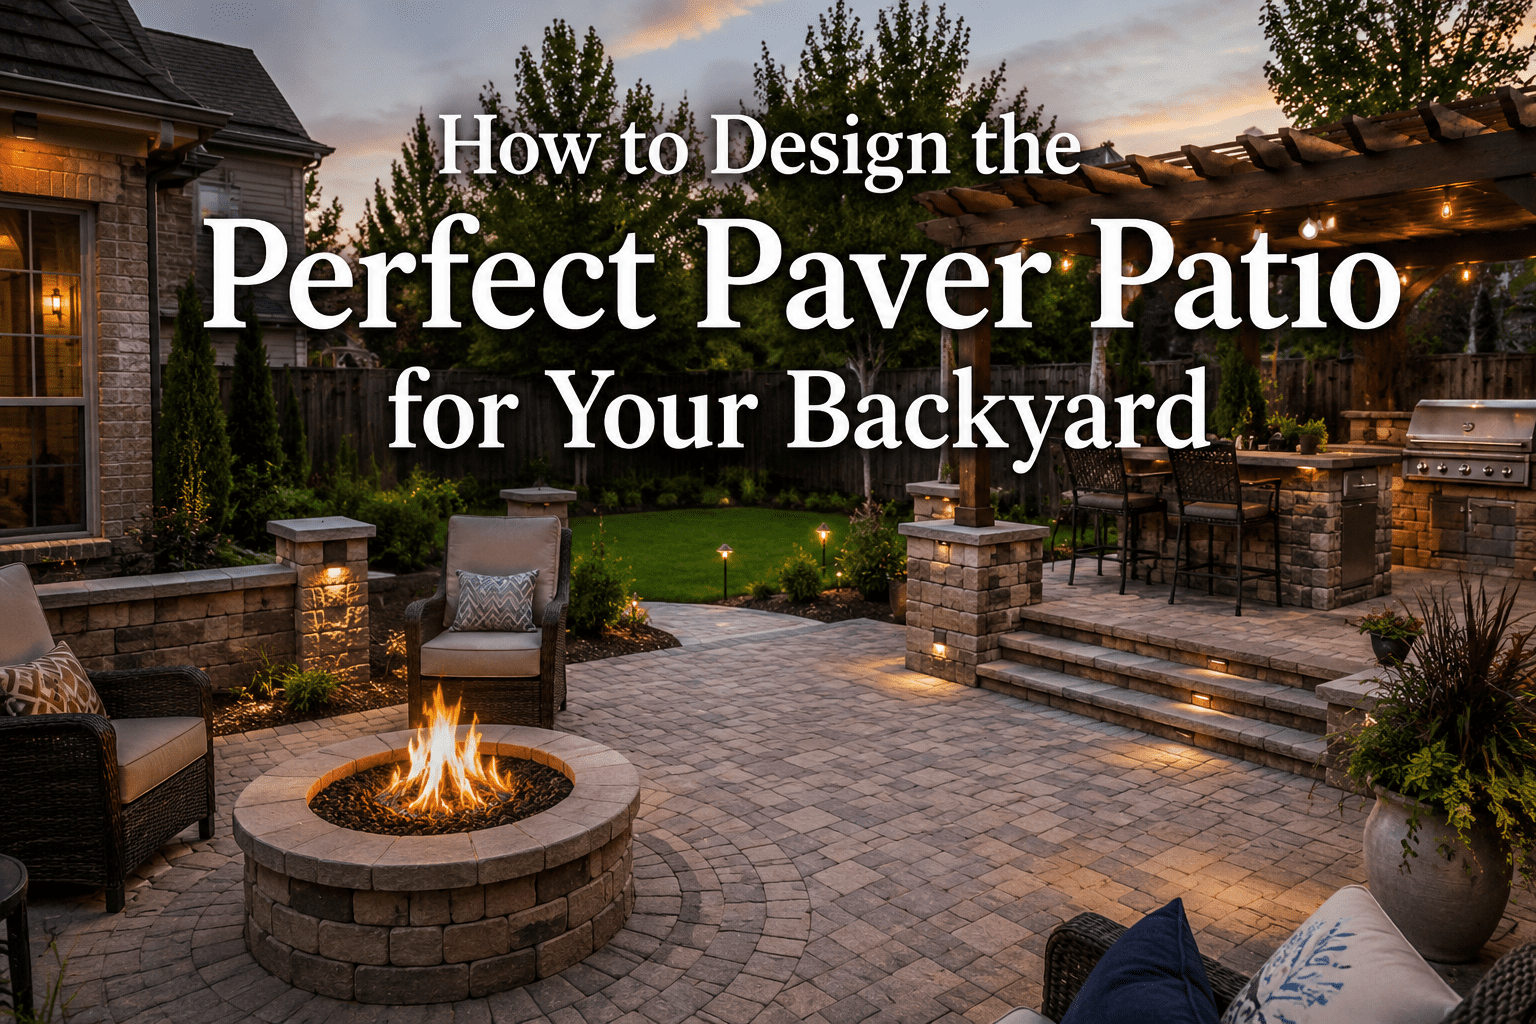
Layouts That Have Worked for Real Backyards
Multi-level patios create distinct zones without requiring fencing or walls. A lower level serves as a dining area, while an upper section becomes a lounge with a different perspective. This approach works particularly well on sloped properties where a single-level patio would require significant grading work.
L-shaped and U-shaped layouts wrap around existing landscape features or create a sense of enclosure that rectangular slabs do not achieve. For smaller yards, a strong rectangular layout with a deliberate border treatment often delivers the cleanest visual impact without overwhelming the surrounding space.
Making the Patio Feel Like It Belongs There
A patio that looks dropped into the yard without consideration for what surrounds it always reads as incomplete. Planting beds along the edges softens the transition between hard surface and lawn. Ornamental grasses, low perennials, and shrubs placed along patio borders frame the space and give it context within the larger garden. A pergola or overhead structure adds definition and shade, making the patio feel like a true outdoor room rather than an exposed slab.
Step design matters more than most homeowners realize. When the patio sits above the surrounding grade, the steps become a design element. Wide, shallow steps in a matching paver material look intentional. Narrow steps in a different material look like they were added as an afterthought.
The Foundation Work That Nobody Sees but Everyone Relies On
Base preparation is the most important part of the entire installation and the part that is invisible once the job is done. A properly compacted crushed stone base prevents settling, shifting, and uneven surfaces. In Long Island’s climate, a four to six-inch compacted base is standard for a residential patio. Skipping proper compaction or using inadequate base depth is the most common reason paver patios develop problems within the first few seasons.
Drainage: The Detail That Protects the Whole Investment
Water needs somewhere to go after rain. A patio with no drainage provision becomes a pooling surface that is uncomfortable to use and damaging to the base layer over time. The surface should be graded at a minimum one to two percent slope away from the home. Permeable joint sand or a channel drain along one edge allows water to exit the surface rather than collect on it. This step is often skipped in DIY installations and is almost always the first thing that causes problems.
Two Mistakes That Are Easier to Avoid Than to Fix
Joint spacing between pavers is not cosmetic. It accommodates minor movement as the base responds to seasonal temperature changes. Pavers set without adequate joint space press against each other as the base shifts and buckle or crack as a result. Drainage planning done after installation instead of before almost always requires tearing something out. Both are simple to address at the design stage and expensive to correct afterward.
A well-designed paver patio is one of the highest-return improvements a homeowner can make. It adds functional space, significant curb appeal, and long-term property value. Promaster Maintenance Corp has designed and installed paver patios across Long Island, from simple weekend entertaining spaces to fully landscaped outdoor living rooms.