
Want a beautiful walkway without spending on a contractor? Good news—you can do it yourself! A well-laid paver path adds charm and function to any yard. The best part? You don’t need fancy tools or special skills. You will have a durable and stunning walkway.
We will guide you on how to Lay Pavers for Walkway. Just grab your materials and follow along. You’ll save money and still get a pro-level look. Ready to transform your space? Let’s get started!
Why Choose Pavers for Your Walkway?
Pavers work well for a DIY walkway. They are strong and improve curb appeal. They are also very easy to install. They resist cracks and are easy to replace. Different colors and patterns let you customize the design. Pavers allow water to drain which reducing puddles and erosion. A solid base keeps them stable and durable. Using the best base for pavers prevents shifting. Many paver walkway ideas help create a unique look.
- Durable and low-maintenance
- Customizable designs
- Easy to repair and replace
- Better drainage than concrete
- Great for DIY projects
Here’s a Step-by-Step Guide to Laying Pavers for a Walkway
Plan Your Walkway & Gather Materials
Before starting, decide the exact path for your walkway. Measure and mark the area using stakes and string. A three-foot width is ideal for walking space. For curved designs, use flexible edging to shape the layout. Sketch the plan to visualize how it fits into your yard. Proper planning ensures a smooth step-by-step paver installation without delays.
Once planned, gather materials. You’ll need pavers, gravel, sand, a shovel, a rake, and a tamper. A level and measuring tape are essential for accuracy. Choose durable pavers that match your outdoor space. High-quality materials make DIY walkway pavers last longer. Having everything ready speeds up the process.
Prepare the Ground for a Solid Base
Remove all grass, roots, and debris from the walkway area. Dig down at least six inches to create space for the base. A deep base prevents sinking and shifting over time. Compact the soil using a tamper to create a firm foundation. Proper ground preparation is key to laying pavers on sand without future problems.
Spread a layer of crushed gravel after compacting the soil. Use a rake to level it and tamp it down firmly. Gravel improves drainage. It provides a stable base for the pavers. Next, add a one-inch layer of sand. The sand smoothes it evenly with a straight board. This step ensures the pavers sit securely in place.
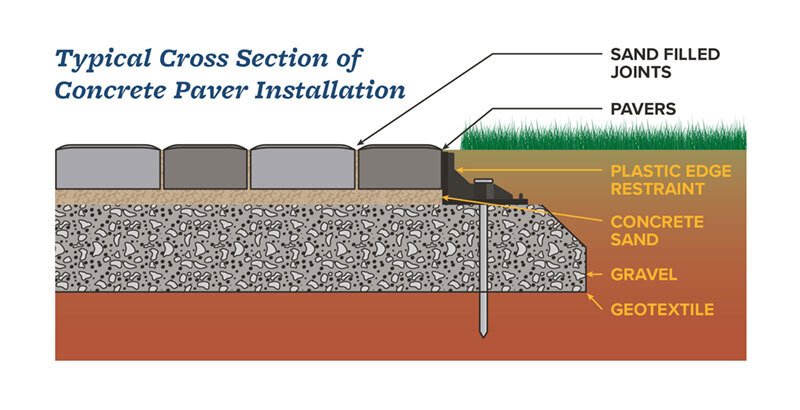
Build a Strong Foundation
A solid foundation is the most important part of your walkway. Start by spreading a four-inch layer of gravel across the area. Rake it evenly and use a tamper to pack it down tightly. Compacting the base properly prevents uneven surfaces and shifting over time. A well-built base makes DIY walkway pavers long-lasting and stable.
Add a layer of sand over the compacted gravel. Use a board to level it out. Create a smooth and even surface. Avoid adding too much sand. The sand can cause pavers to move. Once the sand is levelled, you are ready for paver installation with perfect alignment and stability.

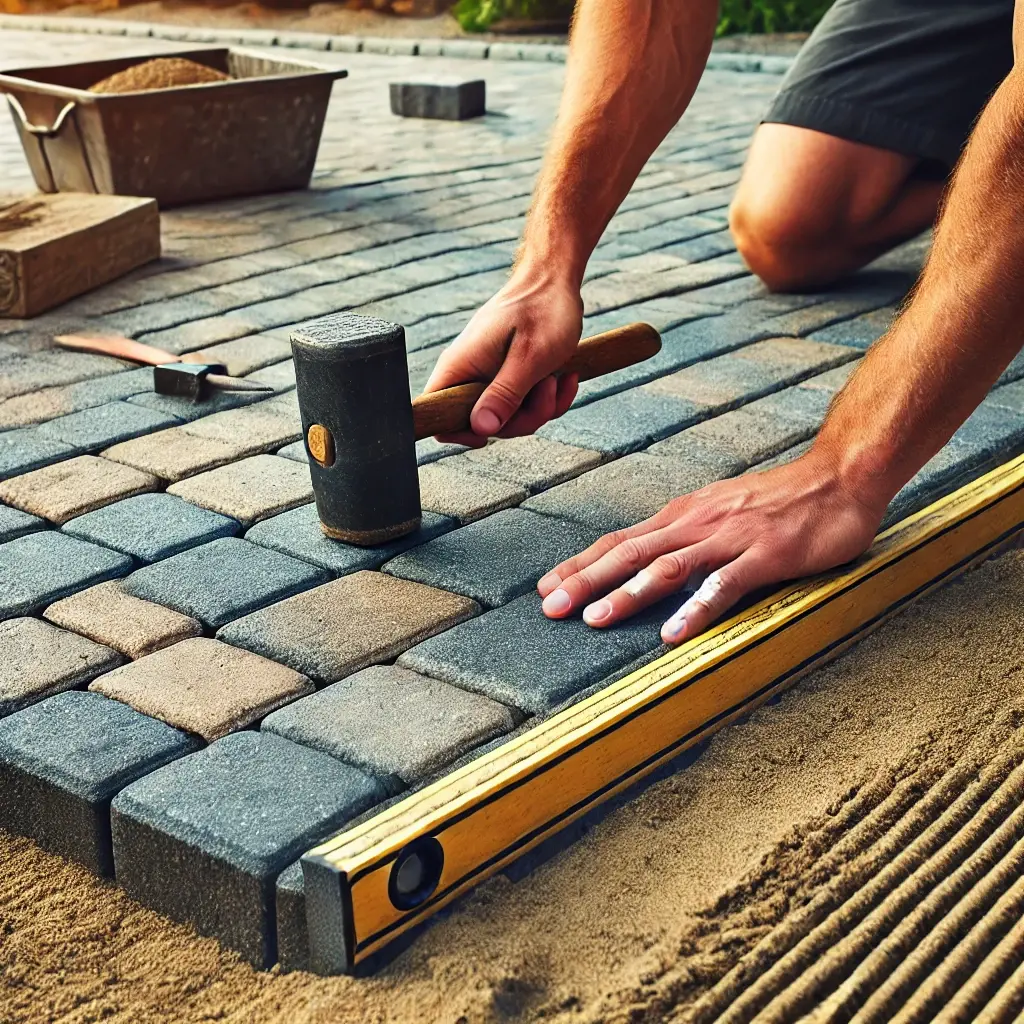
Install the Pavers Like a Pro
Start placing the pavers one by one on the leveled sand. Lay them close together, following your design. Use a rubber mallet to press each paver into place. Keep checking alignment with a straight edge to maintain even spacing. Proper placement ensures a smooth and professional step-by-step paver installation without gaps.
Once all pavers are in position, trim edges as needed with a masonry saw. Use a level to check for any uneven areas. Adjust by adding or removing sand under the pavers. A well-laid surface prevents shifting and keeps your DIY walkway pavers looking neat and stable for years.
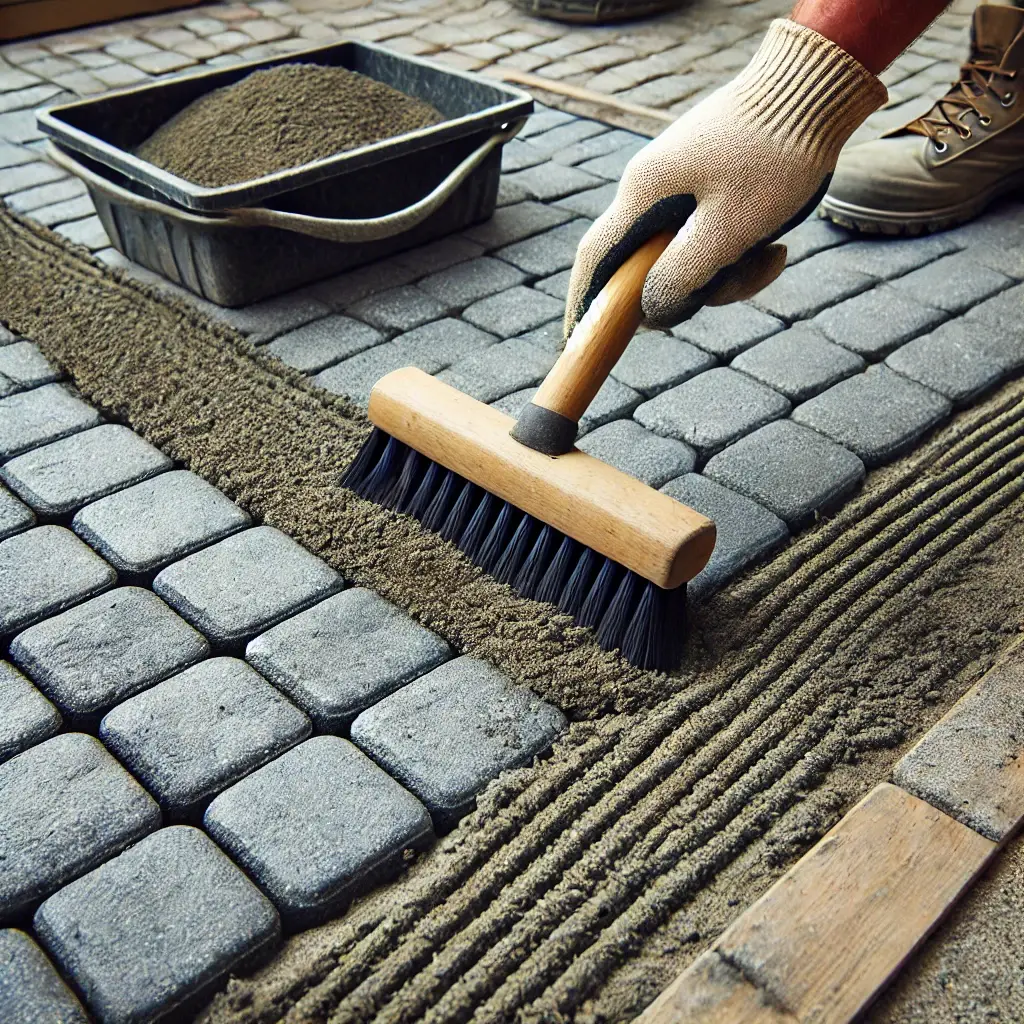
Lock & Finish Your Walkway
Spread polymeric sand over the pavers, sweeping it into the joints. This locks them in place and prevents weeds from growing. Use a plate compactor or gently tap with a rubber mallet to settle everything. Compacting secures laying pavers on sand for a strong and lasting walkway.
After filling the joints, lightly mist the surface with water. This activates the polymeric sand, creating a firm bond. Let it dry completely before walking on it. Edge restraints help keep the pavers from shifting. A well-sealed walkway stays intact and requires less maintenance over time.
Maintain Your Paver Walkway
Regular maintenance keeps your walkway looking great. Sweep off debris and wash with mild soap and water. Reseal the pavers every few years to protect against stains and fading. Proper care extends the life of your DIY walkway pavers and keeps them looking fresh.
Check for shifting pavers or weeds between joints. If needed, add more polymeric sand and mist it with water. Remove weeds as soon as they appear to prevent damage. Simple upkeep ensures your walkway remains solid and visually appealing for years.
How Much Does It Cost to Build a Paver Walkway?
Building a paver walkway costs between $10 and $30 per square foot. Material, labor, and project size affect the total price. Concrete pavers cost less, while natural stone costs more. Professional installation increases expenses, but DIY saves money.
Excavation, base material, and edging add to the cost. Sand, gravel, and polymeric sand also increase expenses. Curved designs and intricate patterns raise the price. Proper planning prevents mistakes and keeps costs low.
Choosing simple designs and standard pavers saves money. Buying in bulk and renting tools reduces expenses. A well-installed walkway lasts for years with little maintenance.
Final Thoughts
A paver walkway improves your yard’s look and function. It lasts for years with little maintenance, quality materials, and proper installation. DIY installation saves money and lets you control the design.
Regular upkeep keeps it in top shape. Sweep debris, wash occasionally, and reapply polymeric sand as needed. Simple maintenance prevents shifting and extends its lifespan. A well-built walkway enhances your outdoor space and adds home value.