Outdoor space is the most important part of the home. Especially if it is made of concert. Because concrete enhances its durability, making it both functional and aesthetically pleasing.
But you know the best part? You don’t always need professional help. You can make concrete patios as your DIY projects with proper planning and execution.
Why a DIY Concrete Patio?
Homeowners choose concrete patios for good reasons. For instance:
- The material offers durability at an affordable price point.
- Concrete withstands weather extremes. Unlike wood or composite decking, concrete requires minimal upkeep over the decades.
- Smooth finishes create modern aesthetics. Stamped patterns mimic natural stone or brick.
- Colored concrete adds personality without extra materials.
- Textured surfaces prevent slipping around pools or in shaded areas.
- Concrete works well in backyards, side yards, and pool surrounds.
- The versatility suits various property layouts and landscape designs.
- DIY installation saves thousands of dollars compared to hiring contractors.
Building it yourself requires patience, careful planning, and following proper techniques. The process takes a weekend or two, depending on patio size.
Benefits of Building a DIY Concrete Patio
Cost Savings
DIY patio saves you a lot. Since professional installation for a 12×16 foot patio will cost you between $1,150 and $2,300. But if you will DIY the materials for the same space cost you around $380 to $770.
Long-lasting Durability
Properly installed concrete patios last 30 to 50 years. Totally depends on the quality of the material. Concrete handles freeze-thaw cycles better than many alternatives.
Endless Design Options
Stamped concrete creates realistic stone, wood grain, or brick appearances. Smooth finishes offer contemporary looks perfect for modern homes.
Low Maintenance
Concrete requires occasional sweeping and washing. Clean it with mild soap. Reseal it every 2 to 3 years to protect against moisture and stains.
Adds Property Value
Outdoor living spaces increase home resale appeal. The investment often returns 50% to 70% of costs during resale.
Plan Before You Pour: Essential Preparation
- Choose the right location. Maintain proper distance from property lines according to local setback requirements.
- Check local requirements according to the HOA. They have standard guidelines about colors, finishes, and placement.
- Determine size and shape. Measure outdoor furniture to ensure adequate space.
- Buy all the right tools and materials before you even start.
- At last, don’t forget to plan properly so you don’t exceed your budget.
Step-by-Step Guide: How to Build a DIY Concrete Patio
Step 1: Mark & Clear the Area
Remove all grass, plants, and debris from the patio location. Outline the exact shape using wooden stakes at corners. Connect stakes with mason’s line to visualize boundaries. Mark the outline with spray paint for clarity during excavation.
Step 2: Excavate the Ground
Dig 4 to 6 inches deep across the entire area. Depth accommodates gravel base, concrete thickness, and slight above-grade positioning. Proper depth prevents cracking and settling. The excavation should extend 6 inches beyond the final patio edges for working room.
Step 3: Add Base Gravel
Pour 2 to 3 inches of crushed gravel over excavated soil. Spread evenly with a rake. Compact thoroughly using a plate compactor. Well-compacted gravel prevents settling and improves drainage. Water drains through gravel rather than pooling under concrete.
Step 4: Build the Concrete Forms
Cut lumber to match patio dimensions. Secure boards with stakes driven 2 feet into the ground. Forms must be level along their length but should slope ¼ inch per foot away from structures. This grade promotes water runoff. Check the level frequently while building forms.
Step 5: Reinforce with Rebar or Mesh
Place rebar in a grid pattern with 18-inch spacing. Wire mesh offers lighter-duty reinforcement suitable for pedestrian traffic. Position reinforcement in the middle third of the concrete thickness. Use dobies or brick pieces to elevate the rebar 2 inches above the gravel. Reinforcement prevents cracking from ground movement and temperature changes.
Step 6: Mix & Pour Concrete
Follow manufacturer instructions for water ratios. Concrete should be workable but not soupy. Pour evenly throughout forms. Start at the farthest point and work toward access areas. Have helpers ready because concrete begins setting within 30 to 45 minutes in warm weather.
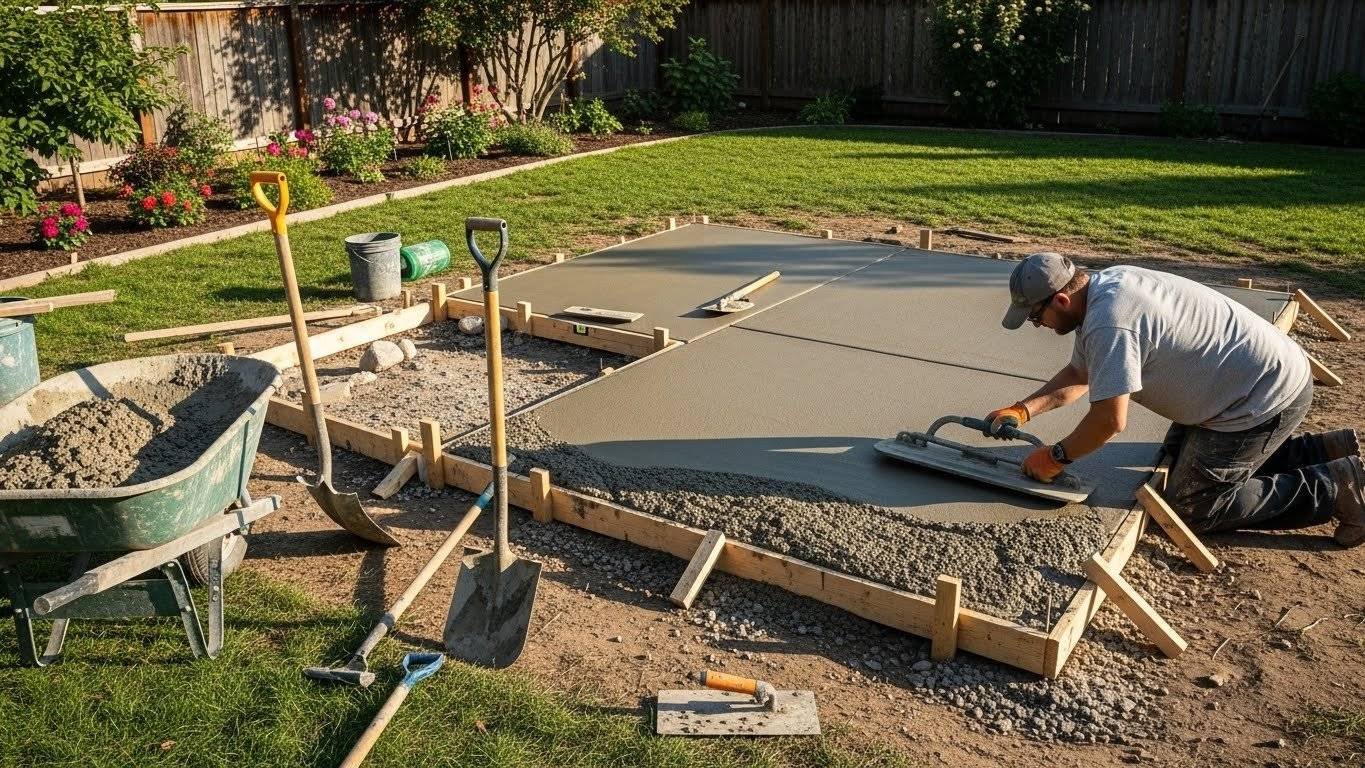
Step 7: Screed & Smooth
Drag a straight board across the form tops to the level concrete. This process is called screeding. Use a bull float for initial smoothing on larger areas. Finish with a hand float for medium texture. A trowel creates smooth surfaces but may become slippery when wet.
Step 8: Add Texture or Stamp (Optional)
Broom finishes prevent slipping and hide minor imperfections. Drag a stiff broom across semi-set concrete in straight lines. Stamped patterns require working quickly before the concrete hardens. Press stamps firmly and evenly. Lift carefully to avoid smearing. Release agents prevent stamps from sticking.
Step 9: Let It Cure
Concrete needs 7 days to cure properly. Keep surfaces moist by misting several times daily. Cover with plastic sheeting to retain moisture in hot weather. Prevent foot traffic for 24 to 48 hours. Avoid heavy loads for one week. Proper curing develops full strength and reduces cracking.
Step 10: Seal Your Patio
Wait 28 days before applying the sealer. Clean the surface thoroughly before sealing. Choose penetrating sealers for natural appearance or film-forming sealers for enhanced color. Apply according to product instructions using rollers or sprayers. Sealing increases lifespan, enhances appearance, and simplifies cleaning.
Design Ideas to Upgrade Your DIY Concrete Patio
Designs mean a lot if you are DIY-ing your patio:
- Stamped patterns replicate stone, wood grain, or brick at a fraction of the cost.
- Colored concrete uses integral pigments mixed throughout.
- Acid stains create variegated earth tones.
- Decorative borders define edges with contrasting colors or patterns.
- Fire pit-friendly layouts incorporate circular areas with proper clearances.
- Integrated seating uses concrete to form permanent benches.
- Planters and lighting add ambiance and functionality.
Common Mistakes to Avoid
Avoid these common mistakes to increase the durability of your patio:
- Poor leveling creates puddles and drainage problems.
- Skipping the gravel base leads to settling and cracks.
- Incorrect concrete mixing produces weak surfaces.
- Pouring during extreme heat causes rapid setting and cracking.
- Removing forms too early damages edges.
- Forgetting drainage planning creates water problems.
- Neglecting to seal allows staining and moisture damage.
Final Thoughts
Building a concrete patio offers rewarding results for DIY homeowners. But it requires careful planning to eliminate common problems.
Want to transform your backyard with professional help? Contact Promaster Maintenance Corp for professional concrete patio installation that exceeds expectations.